Wood Working Tool Rest
|
|
I attended a seminar at Lee Valley on making pens. They used a Taig lathe,
and I decided that I liked the tool rest that I used. I looked at the Taig
version and the Sherline version, and decided that I liked the Lee Valley
version.
This describes what I did to adapt the Lee Valley tool rest for the Taig
lathe to work on my Sherline.
|
|
|
|
|
|
|
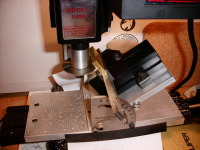
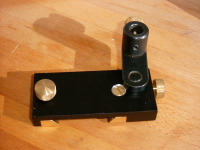
Original Dovetails
This shows the original dovetails, which are 45 degrees, versus the 55.5
degree angle on the Sherline. The Taig lathe bed is also wider, at 2.215"
versus 1.75" for the Sherline. I didn't like the fact that the screw on the
back pressed directly into the dovetail, even if it was made of brass.
Bigger...
|
|
|
|
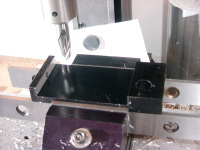
Remove Dovetails
The first step was to remove the dovetails from the tool rest. The base
is made out of aluminum so it was easy to machine.
Bigger...
|
|
|
|
|
|
|
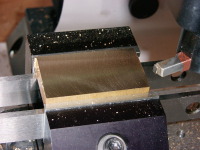
Prepare new Dovetails
I had a big chunk of brass, so I cut a slice off, and used the fly cutter to
make both surfaces nice and parallel. An end mill was used to finish the
edges. The surface looks fairly rough in the picture, but it's actually
quite smooth to the touch.
Bigger...
|
|
|
|
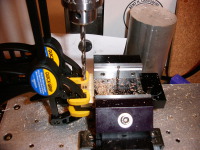
Cut Dovetail angle
I used the angle plate, in conjunction with a slitting saw to cut the brass
into two pieces. The angle plate is set to 34.5 degrees (90 - 55.5 = 34.5).
The slitting saw couldn't make it quite all the way through, so I used my
Xacto saw to finish the cut. With the top portion removed, the slitting saw
was able to finish the cut.
Bigger...
|
|
|
|
Drill Mounting Hole
The brass pieces were threaded for a 10-32 thread (which matched the thread
on the little brass bolts that came with the tool rest). I drilled the pilot
hole through both pieces to ensure that they would be lined up properly.
A clearance hole was drilled in the base, and the front hole was countersunk
on the top side.
Bigger...
|
|
|
|
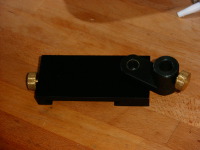
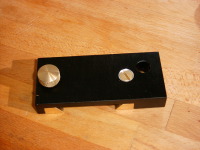
Finished Base
This is the finished base. The rear screw (with the knurled knob) which
used to be on the back, is now on the top and clamps the rear dovetail
piece against the lathe bed. The rear dovetail is just a bit wider than it
needs to be. This ensures a bit of clearance for clamping. i.e. When mounted
on the lathe bed and secured there will be a slight gap between the brass
piece and the tool rest base.
Bigger...
|
|
|
|
|
|
|
|
|
|
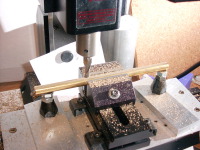
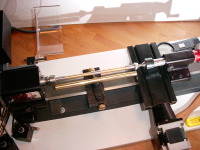
Flat on rest
I happened to have some 3/8" brass rod, so I cut a piece to length, cleaned
up the ends on the lathe and put a slight chamfer on the ends. I then put
a flat along the length. Here you can see the
machinist's jacks
being used for support.
Bigger...
|
|
|
|
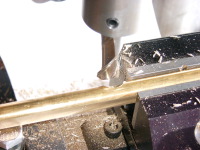
Mounting Notch
Using a 3/8" end mill, I put a notch half way through the 3/8" rod. It's
half way through depth wise and thickness wise. I then cut a short vertical
piece, put a 45 degree angle half way though, and soldered the two pieces
together.
Bigger...
|
|
|
|
|
|
|
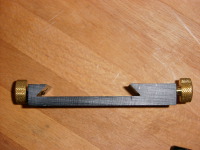
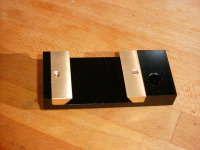
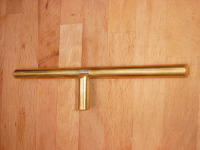
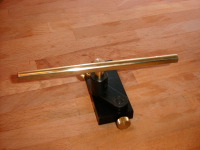
Fully Assembled
This is the fully assembled tool rest. Next time, I'll probably use steel
for the tool rest portion, because the brass has numerous scratches on
it already after making a half dozen pens. I should have expected that
resting an HSS gouge on the relatively soft brass. I'd also make the
tool rest a bit shorter.
Bigger...
|
|
|
|
|
Home
- Wood Working
|