Marauder Bottom
|
|
This page contains details about how the battery case was mounted.
|
|
|
|
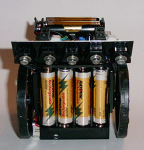
Bottom View
Here's the bottom view with the batteries mounted. I trimmed the mounting
tabs off the backs of the line sensors, and mounted the battery case
directly to the chassis, so that the battery case never touches the ground,
even when Marauder is tilted backwards.
Bigger...
|
|
|
|
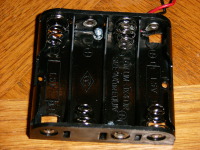
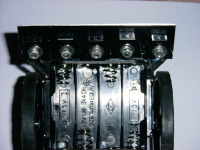
Modified Battery Case
I had to cut four holes in the case itself. This is where the bolt heads
which from the vertical mounts that attach to the servos go. There are
two #2 screws near the center that hold the battery case to the chassis. When
the screws are screwed in all the way, the screw heads clear the batteries
because the batteries are round.
Bigger...
|
|
|
|
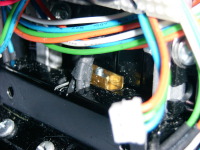
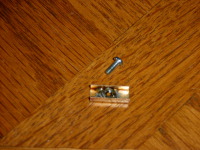
Front Battery Case Mount
I cut a notch in the front scoop to allow the wires from the center
sensor to be pushed a little bit further forward. They would normally
be in the same position as the brass U channel seen in the picture.
The brass U channel crosses the slot in the chassis (the slot is visible
in the next picture).
Bigger...
|
|
|
|
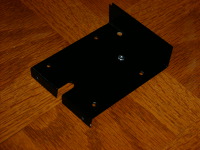
Rear Batter Case Mount
The nut seen here has been glued to the chassis (solder won't work since the
chassis is made from aluminum). I used a cyanoacrylate glue (slower curing
than crazy glue) to secure the nut. You need to be careful where the holes
go because the servos touch the chassis.
Bigger...
|
|
|
|
Front Nut Improvement
I got tired of juggling things while trying to screw the screw in, so I
soldered the nut into the U channel. Much easier.
Bigger...
|
|
|
|
Mounted Battery Case
Here you can see the battery case mounted in place. You can see the four
screw heads that protrude into the bottom of the battery case, and you
can see how close the battery case is to the front sensors.
Bigger...
|
|
Home
- Line Maze 2006
- Marauder
|