Brass Screws for Louise's Inkle Loom
|
|
My wife, Louise, likes weaving and quilting. Louise recently purchased an
inkle loom, which is one of the simplest types of looms. The one Louise
got has two sides, one of them removable. The screws that came with the loom
require a screw driver to remove and tighten, so I thought it would be good
to create some nice looking brass screws which would be tightened and
loosened by hand.
When I started to do this project, I also wanted to check the headstock
for alignment with the bed (the Sherline headstock can pivot). The piece
of brass that I had to make the screw heads out of was 3/4" in diameter and
5 or 6 inches long. It goes all the to the back of the jaws. I made a few
light passes, and after each pass I measured the diameter by the chuck and
at the end with my micrometer. Initially, the diameter at the end was 0.005
bigger than at the headstock (i.e. there was a taper of about 0.001 per inch).
Since there's a key between the headstock and the bed, rotating the headstock
really just amounted to loosening the hold-down screw, applying pressure
in the right direction and tightening the hold-down screw. After the third
pass, it was within 0.0001. It probably wasn't really that close, as I doubt
that I have the "touch" to get tenths measurements reliably, but it was
as good as I'm able to do for now.
|
|
|
|
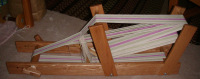
Inkle Loom
This is Louise's new Inkle Loom. You can see the heads of the existing
screws at the very bottom, one in the middle, and one on the right hand
side.
Bigger...
|
|
|
|
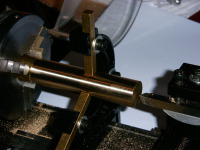
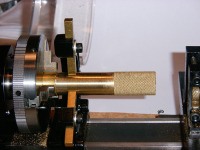
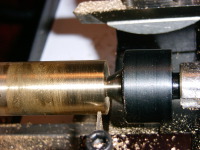
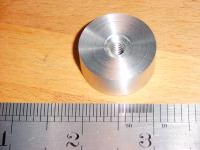
Ready for Facing
After alignment, I added the steady rest to perform the facing operation.
Using the steady rest allowed me to use the piece that I already had chucked
up for alignment, and to minimize wastage.
Bigger...
|
|
|
|
|
|
|
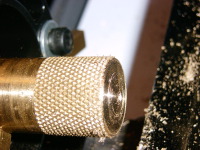
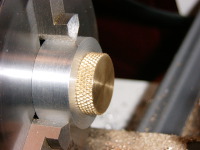
Knurl
Here's the finished knurl. It's still covered in cutting fluid.
Bigger...
|
|
|
|
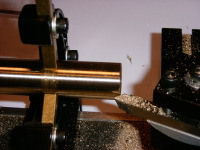
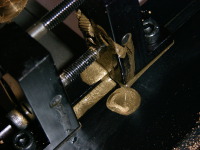
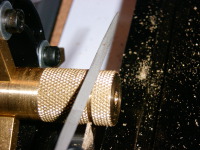
Finished Knurl
This is the finished knurl with most of the fluid wiped off. You can see
the slurry of cutting fluid with brass bits in it on the knurl (far right).
I also labeled the gib, which sticks out enough that I had to move the
steady rest over in order to do the knurling.
Bigger...
|
|
|
|
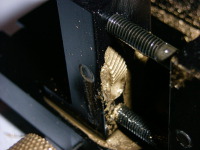
Mess
Here's a closeup of the mess created by the cutting fluid and brass bits.
It looks like gold paint.
Bigger...
|
|
|
|
Mess
Another view of the mess. I thoroughly dissassembled, cleaned and re-oiled
everything in the knurling attachment.
Bigger...
|
|
|
|
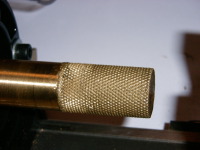
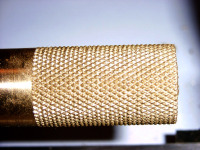
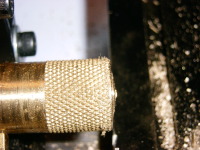
Knurl Closeup
Here's a closeup of the finished knurl. In the picture, I see what might
be a few flat spots, which means I probably should have gone a bit deeper.
I'll have to check later.
Bigger...
|
|
|
|
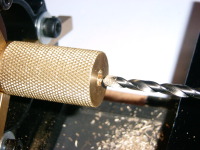
Drill Center Hole
I drilled a hole for mounting the threads to the head. I used a #21 (0.159")
drill, and used the tailstock handwheel to advance 0.200" (the tip of the
drill went in this far).
Bigger...
|
|
|
|
|
|
|
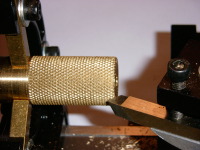
Add Second Chamfer
I used a small needle file to add the chamfer to the other side after
starting the parting operation. This turned out to be much easier than
using the toolbit.
Bigger...
|
|
|
|
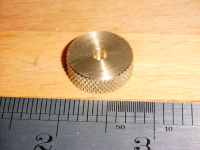
Finished Head
Here's the finished screw head. I made the head have a thickness of
0.250" + 0.010" for finishing. I wasn't sure what the finish of the parting
operation would look like, which is why I added the 0.010". The first head
parted really nicely
Bigger...
|
|
|
|
|
|
|
Weird Parting
Here's another view. The parting wasn't straight either. It took me
a while to figure out what was happening, and I still don't understand why
it happened. As the parting tool was fed into the part, the part was sucked
out of the 3-jaw chuck by a small amount. I double checked everything
and nothing else was moving. If the parting tool was withdrawn, it no longer
lined up with the portion where it started. Fortunately, I added the 0.010
extra!
Bigger...
|
|
|
|
Make washers
After making screw heads from the knurled portion, I decided to make a few
washers as well. I found that 0.050" was a nice thickness. 0.040" felt too
thin. I drilled out the center portion of the washer using a 0.250" drill
bit.
Bigger...
|
|
|
|
Parting the Washer
I decided to use the tailstock to prevent the material from being pulled out
of the chuck. It took me until this point to figure out that it was the
raw material being pulled out of the 3-jaw chuck. With the tailstock in
place, the parting operation was nice and straight. Note that the hole in
the end was drilled, not center drilled, so the parting tool won't actually
touch the live center.
Bigger...
|
|
|
|
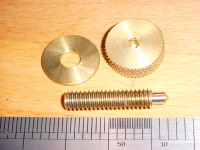
Finished Washer
Here's a picture of the finished washer. I added a slight chamfer to the
edges, similar to the head, using a small triangular needle file, while the
washer was still spinning on the lathe.
Bigger...
|
|
|
|
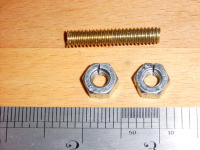
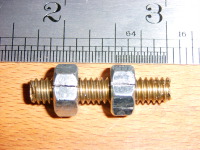
Threaded Rod
I cut off a piece of 1/4-20 all-thread, and used a hacksaw to cut slits
in two 1/4-20 nuts. I squeezed the nuts using vice grips to ensure a snug
fit of the nuts on the all-thread.
Bigger...
|
|
|
|
Ready For Chucking
The nuts need to be about 5/8" from outside to outside in order for the
3 jaw chuck to grip both nuts securely.
Bigger...
|
|
|
|
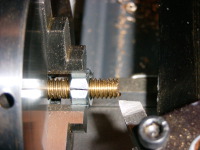
Turn Down End
With the nuts and all-thread mounted in the chuck, we're ready to turn
down 0.200" of the end until it just fits in the head. Notice that the
slits in the nuts are between the jaws. When I got within 0.004" of the
desired diameter (0.002" of travel remaining on the cross-slide), I started
advancing by 0.0005" (which reduces the diameter by 0.001") and checking
for fit each time.
Bigger...
|
|
|
|
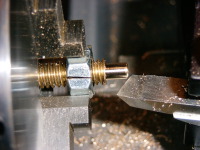
Setup for Turning Point
The end has been turned down to size, and the head fits over the end. Since
a regular drill bit was used to drill the hole, we shape the end to match.
I used a drill bit to eyeball the angle. By feeding the toolbit using the
cross slide, I got a nice chatter free point.
Bigger...
|
|
|
|
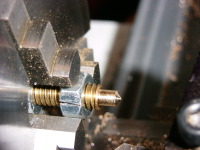
Point Turned
This is the finished point. Since the point of the tool bit is on center,
the edge that touches the center of the point will be a bit below center,
and the point will have a small flat spot on the end.
Bigger...
|
|
|
|
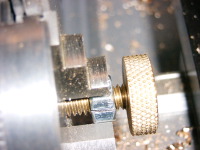
Check Fit
Here, the knurled bolt head is being checked for fit, and seats fully.
Bigger...
|
|
|
|
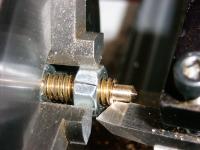
Cleanup Thread
I changed the angle to match the 60° thread angle, and cleaned up
where the thread meets the sholder. A bit of hand filing completed the
cleanup.
Bigger...
|
|
|
|
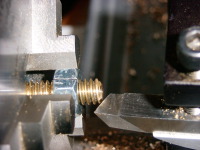
Cleanup Other End
Leaving the toolbit at the same angle, the piece is swapped end-for-end and
the other end is cleaned up.
Bigger...
|
|
|
|
|
|
|
Assembled
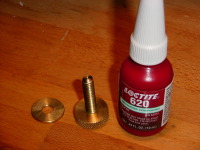
I used some Loctite to assemble the pieces. I put a drop of Loctite in
head, and placed the bolt into the hole in a swirling motion. I then let
it sit for about 6 hours before facing.
Bigger...
|
|
|
|
Holding Fixture
This is the fixture I made for facing the end. I didn't think of using the
nuts (with the slits in them), but that probably would have worked just as
well.
Bigger...
|
|
|
|
|
|
|
|
|
|
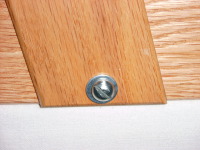
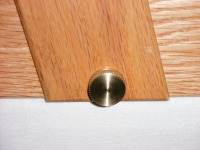
New Bolt
Here's a picture with the new bolt installed. Not only does it look better
but it can be installed and removed without a screwdriver. There were two
bolts (the middle one is pictured here).
Bigger...
|
|
Home
- Machinist
- Projects
|